I've started with a low-quality, grainy, under-contrasted photo (stock here).
1.Let's first change the color balance. Go to Image->Adjustments->Color Balance ( CTRL+ B ) and play with the sliders... I used values close to these:

2. Duplicate this layer (CTRL+J), apply Filter->Blur->Gaussian Blur , use a high value 25 or so... Change the blending mode to Linear Dodge (Add) and lower the opacity to 58% .
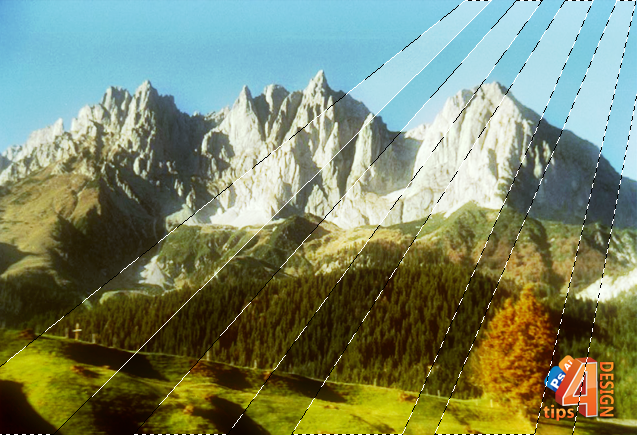
3. Create a new blank layer. Using the Polygonal Lasso Tool (L) make some selections as in the picture below. Note that after you've made one selection you have to hold ALT to add a new selection to the current one. Fill (SHIFT+F5) the selected area with white, put the layer on Overlay, 38% opacity.

4. Create 2 new layers.
On one layer:
First select the Magic Select Wand (W). Use the want with a tolerance of 50 the layer containing the photo after the color-balance. Having this selection go back to the empty layer and fill the selection with a blue->cyan gradient. Apply Filter->Blur->Gaussian Blur as you did in the second step (or simply press CTRL+F).
On the other layer:
Make a selection using the Polygonal Lasso Tool (L), selecting the bottom part of the layer. Apply a dark green->green gradient. Use the same Blur effect as before.
5. Put these both layers on Overlay (100% opacity).
6. Press D to set the foreground color to black and the background color to white. Make a new layer and use Filter->Render->Clouds. Take the Eraser Tool(E) ( 370 size,57% opacity,52% flow ) and erase the center part of this logo, leaving only the margins visible.
Put this layer on Screen.
7. Create a new layer, use Image->Apply Image, then Filter->Blur->Radial Blur using the Zoom method and an amount of 56. Erase the center of this layer as you did with the clouds.
8. The final step is to add a border. Create a new layer, fill it with any color, change the Fill to 0%. Open the Layer Style panel (by double-clicking to the right of the layer's name) and check Stroke. Use these values:
Here is the outcome:
Download the PSD here !
Stay tuned! There are a lot more exclusive tutorials that will be posted!


 Self-hosted analytics
0 comentarii:
Post a Comment